Monday, October 3, 2011

Altered Book Class Results

Dominion Day Services Staff, created some wonderful books today during their Personal Reflection Seminar!!


A lover of Fishing created this book!!!
Great Cover!!


Simplicity!!!
She promised to fill in some pages at home!


 Can you guess who's book this is?  Nice job!
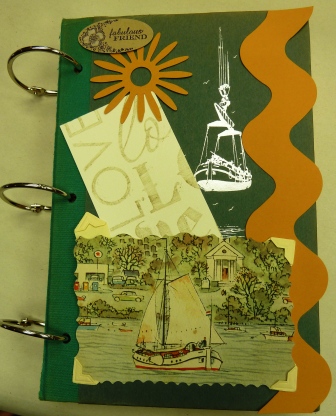

Sailing off into the Future!
You should see the inside of this one!! 


A mother's love for her daughter overseas!
She used a pocket from an old shirt, so the front cover can actually function as a storage place!  Cool!


It is what it is!  That's her moto!
Many more nice and meaningful pages in this book!


Cool idea using the negative strip!  Great job!


A romantic cover!
You all did an awesome job!  It was so fun to see all of you relax and get in the creative mood!
Hope to see you again soon!!!

Saturday, September 17, 2011

Debi, Sue & Friends Meet for Apples!!

This quarter we had nine friends join us for our Appleicious Theme!
Sue showed us how to made fresh Apple Butter!  An easy recipe she found online.  
Our amazing Sue cooked up batches of Apple Butter at home so that she had completed Apple Butter and half made Apple Butter.   She is amazing!  The Friends helped cut the apples and put them into the crock pot!


From there Sue took us, magically, to the pot of Apple Butter that was ready to process!


We then filled the jars!


The finished product!


Sue made these awesome labels and tags using our DS&F Logo!

For our craft, we stamped canvas bags using real apples!


We used So-soft Fabric paints in reds, greens and yellows.  
We used brown for the stems and black for the seeds.  


Cutting the apple one direction gives a nice traditional apple shape.
Cutting the apple across the middle gives a cute star shape in the center.


We think our friends did a wonderful job with their bags!!!
Let me know what you think!

Tuesday, September 6, 2011

Pumpkin Scepters Class Results!!!

Class was held Saturday 9/3!
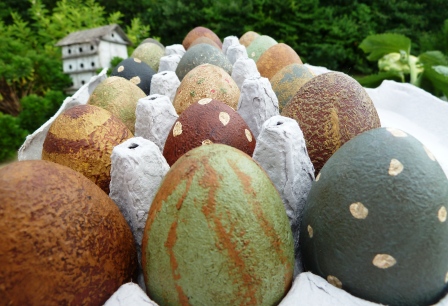
Look at the results of the talented women that attended class!!

Thanks Ladies for letting me share your creativity!

Thursday, September 1, 2011

Kathy & Pete's Wedding Box

Made with items from the wedding and reception!

The bandanna was wrapped around fresh homemade pies that were centerpieces at the reception.  I used  Mod Podge on the outside of the cigar box and adhered the bandanna to the box.

Attached to the bottom of the box, is a label that the out of town guests received in their hospitality bag!

The inside of the box is painted white and I attached photos, stickers, my invitation and other memorabilia  from the wedding and reception.

Inside the box!
The invitation!

Inside the lid!

Parents and inlaws!

My place card and another sticker!

Hope you enjoyed looking!  Leave me a comment and let me know what you think!

Monday, August 22, 2011

Caromal Colours Reclaim Corners Cabinet


Look at this fabulous make over!


This is what we started with!  It used to sit on the landing in our home!


April removed the hardware and door and applied the first coat of Reclaim in Latte!


Here is April, happy that the second coat is done!!


Now for the knob!  April and Frank wanted the knob on the left!  A beauty that I picked up in May at a flea market, but I was not willing to let it go!  Selfish me!  So, I took the the middle knob and applied a coat of  Caromal Colours Textured Base Coat in Peppercorn.  Once dry, I applied Chipping Creme and let that dry.  The last coat was the Textured Base Coat in Putty.  I painted a teal colored circle in the middle to mimic the first knob.  April used a piece of metal and chipped off some of the paint to give it the aged look of the first one.  Do you like this?  We do!!!


April put the hindges, knob and latch back on!


I love it!


No work needed to the inside!


Finished!!  In one short afternoon!


My favorite part!!!
Hope you join as a follower!!  Then you can be the first to see our next creation!
If you order Caromal Colours online please remember to use my coupon code "DGS" for a discount on shipping. 


Saturday, August 6, 2011

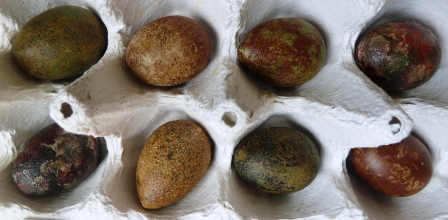
Frank & Debi's Painted Eggs

 Three dozen + painted wooden eggs.


 In an effort to clear out my basement studio storage, 
Frank and I tested our Caromal Colours on these wooden eggs.  
(if you order the paints online, remember to use my code DGS to get a discount on your shipping!)


Close ups show some of our techniques!

If you don't have wooden eggs you can use plastic ones.  
The paints stick just as well to the plastic as they do to wood!  


We like how they turned out! But they can be a challenge to paint!

We painted a base color on each egg, covering the entire egg and let them dry on a wire drying rack. Once dried we touched up the area of the egg that touched the wire rack.

I sanded each egg before we began the decorating details.

 The decorative details were the most fun of this whole process!  We dried them on the wire rack as well. I sanded them one more time, covered them with toner and my final step was waxing the eggs with Liberon Fine Paste Wax.


These are the mini baby eggs!  Aren't they so cute?
You can also contact me through my website, DeborahGayleStudio.com, and order the paints directly from me.

Thursday, August 4, 2011

Hydrangea Tray using Caromal Colours Reclaim

Hydrangea Tray 18" in diameter.
This beautiful wooden tray was made in Sweden and had seen better days.

Using White Reclaim, I rolled the paint on both sides of this tray. Two coats were needed to cover the black splotch on the wood.

Caromal Colours has a wonderful large Hydrangea Stencil!

Using Caromal Colours Stencil Cremes I stenciled the flower using Lilac, Berry Blue and some Snowberry.
For the leaves I used Mossy Green and Mother Earth.

When the Stencil Cremes were dry I sanded the entire piece and used a scrapper to remove paint in areas, giving it age.

Toner was brushed over the entire piece and some was removed with a soft rag.

Two coats of varnish seal the tray so that is can be used as intended!